About the Stats MSc compute servers apollo, artemis, hydra & zeus
-
- The Stats section has four compute servers dedicated to MSc student use listed below:
- apollo: two Intel Xeon X5670 CPUs, 12 cores, 24 threads and 192GB of memory
- artemis: two Intel Xeon X5670 CPUs, 12 cores, 24 threads and 192GB of memory
- hydra: four AMD 6380 Opteron CPUs, 64 cores, 64 threads and 512GB of memory
- zeus: four AMD 6380 Opteron CPUs, 64 cores, 64 threads and 512GB of memory
although at the present time (June, 2025) only apollo and artemis will be permanently available owing to ongoing cooling issues in the Maths server room.
- Accessible via ssh from the College network and, in the case of apollo only, directly from outside the College from any network connection, a range of software packages including R, Matlab, Maple, Python, nfdump, etc is installed on all of these systems as well as (on apollo and artemis only) the Jupyter Notebook and Spyder 5 graphical IDEs (Intgrated Design Environments); apollo additionally runs a R Studio server which can be accessed from anywhere using a browser.
- All four systems run the Ubuntu Linux operating system version 24.04 and have direct network connections to the College's central ICNFS service as well as the Maths home directory servers & the Stats section's own data stores. Some familiarity with Linux is desirable to get the most from these systems although the operating system agnostic Jupyter Notebook, Spyder and R Studio IDEs make it easy to work with these systems from anywhere using Windows PCs, Macs and even tablets with virtually no Linux knowledge required.
- Access to these systems is enabled on request by sending an email to Andy Thomas and you can then log into either system using your College username and password. If you are new to using ssh, you might find the ssh pages of interest and also the accessing Maths systems from outside College information if you are working off-campus.
- Direct access to apollo from anywhere is possible using ssh in conjunction with 2 Factor Authentication (2FA) to connect to a non-standard port on this system; the port number will not be disclosed here since these web pages are publicly accessible but if you are a member of the College and wish to use this route, the port information will be sent to you on request. Setting up Google Authenticator 2FA in conjunction with an Apple iPhone or Android smartphone is detailed here and needs to be done before you attempt to connect to the apollo server, whether or not you are in College or logging in remotely. However, you will not need to use 2FA to use the artemis server since it is not directly accessible from outside the College.
- User home directories are by default now mapped to the Maths clustor storage server which has no user disk usage limits and is faster in operation than the central College ICNFS service. This is because of the increasingly larger data sets students are now working with are often too big to fit within the 400 MB per-user disk usage limit of ICNFS. However, users with data on ICNFS can still access this data at:
-
/home/icnfs/ma/<i>/<username>
- where <i> is the first letter of your College username and <username> is your complete username.
-
- Since GUIs (graphical user interfaces) invariably use network ports that are routinely blocked by the College's perimeter firewall for security reasons, accessing these if you are off-campus can be difficult. The recommended solution would normally be to use the College's Unified Access service using the Zscaler Connector but this often does not work for some users. However, the ssh protocol you use for connecting to apollo also has some useful networking features which you can use to carry network traffic to and from other programs over the same link as you use for your interactive login session. Use of both VPN and the alternative ssh port forwarding methods will be described for R Studio Server, the Spyder Python IDE and the Jupyter Notebook IDE.
-
via a College VPN connection:
- If you have successfully connected to the College Unified Access service from your computer or device, you can access the R Studio server on apollo by pointing your browser to:
-
http://apollo.ma.ic.ac.uk:8787
- and you should see the R Studio login screen:
-

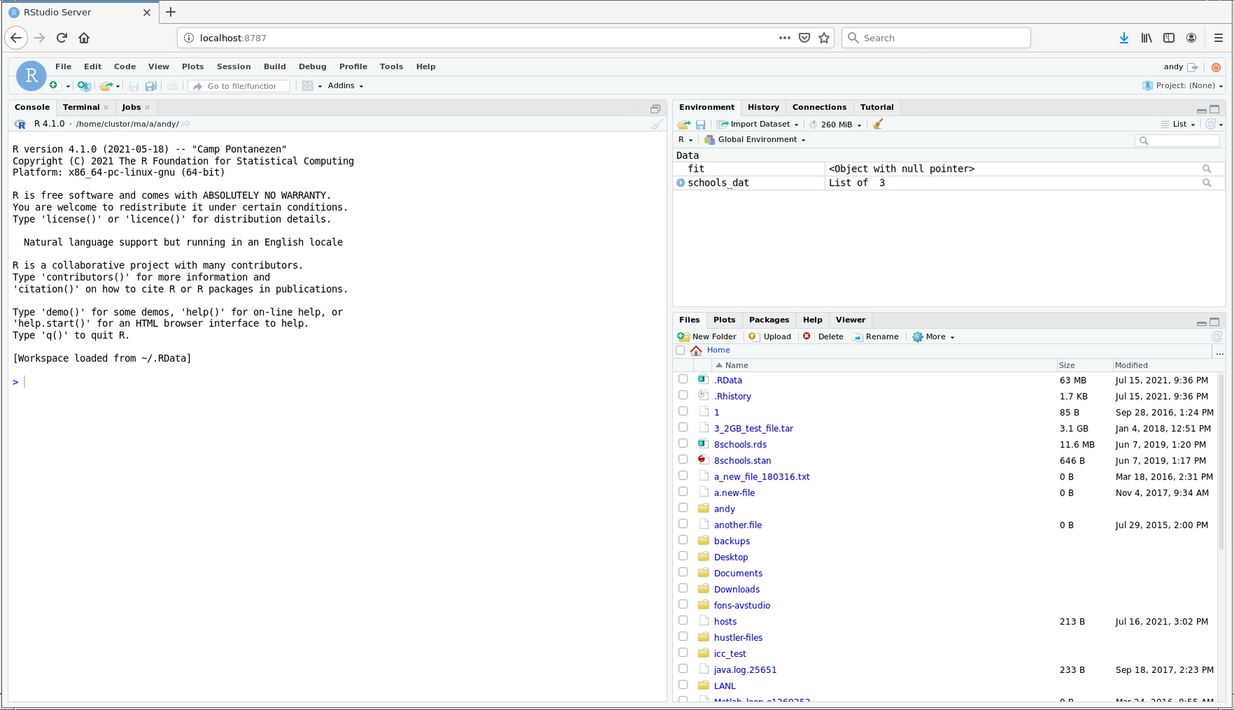
- You'll be prompted to log into R Studio so use your College username & password to do this and you should then find yourself in the R Studio environment:
-
-
- You can instead use port forwarding over ssh to map the R Studio port 8787 to the same port on your system as described separately for Windows systems using PuTTY and for Macs, Linux & UNIX systems
-
- The Spyder 5 Python IDE suite for Linux systems is an X Windows application which can be used over an ssh connection with X forwarding enabled, with your computer's X server configured to allow Spyder to connect to it. Linux and UNIX desktop systems will almost always have an X server installed as part of the operating system and for Macs, you can download and install XQuartz which is a full standard X Window System installation for Mac OS. If you are using a Windows system, you will need both the PuTTY ssh client for Windows and an X server too - Xming is suggested and integrates well with PuTTY although there are others.
- Spyder is based on Conda or Anaconda Python rather than the default Python bundled with Ubuntu and to support this apollo has the alternative Anaconda Python distribution installed as well. Using Spyder is a multi-step process of:
- enabling the X server on your computer to accept incoming connections from Spyder
- logging into apollo with X forwarding enabled and configuring your account on apollo to use Anaconda Python instead of Ubuntu Python
- and starting Spyder
- The instructions given below apply to Macs, Linux and UNIX systems - for Windows systems with PuTTY and Xming installed, please follow these instructions.
enabling your X server to accept connections from Spyder
-
- If you are using a Linux, UNIX or Mac system, the easiest way of allowing the X server on your computer to accept connections from Spyder is to open a terminal and type:
-
xhost +apollo.ma.ic.ac.uk
- This will open your X server to all remote X connection requests arriving at your computer from apollo and is guaranteed to allow Spyder access, although strictly speaking it is less secure than a more detailed invocation of xhost (see the man page for xhost if you really do want to narrow down the access permissions).
making Anaconda Python your default Python on apollo
-
- The next thing you need to do is to make this Python distribution the default for your own login sessions. You can do this by first logging into apollo, including the '-X' option to enable X forwarding:
-
- if you are on-campus in College or using VPN:
ssh -X username@apollo.ma.ic.ac.uk
- or if you are off-campus and outside the College:
ssh -X -p portnumber username@apollo.ma.ic.ac.uk
- replacing portnumber with the non-standard port number you have been given for accessing apollo from outside the College
- Now edit your ~/.bashrc file using your favourite Linux text editor (nano is suggested for those new to Linux) and adding the following lines to it (if you don't already have a .bashrc file in the top level of your home directory, just create one):
-
# conda initialize>
# !! Contents within this block are managed by 'conda init' !!
__conda_setup="$('/opt/anaconda3/bin/conda' 'shell.bash' 'hook' 2> /dev/null)"
if [ $? -eq 0 ]; then
    eval "$__conda_setup"
else
    if [ -f "/opt/anaconda3/etc/profile.d/conda.sh" ]; then
        . "/opt/anaconda3/etc/profile.d/conda.sh"
    else
        export PATH="/opt/anaconda3/bin:$PATH"
    fi
fi
unset __conda_setup
# end of conda initialize
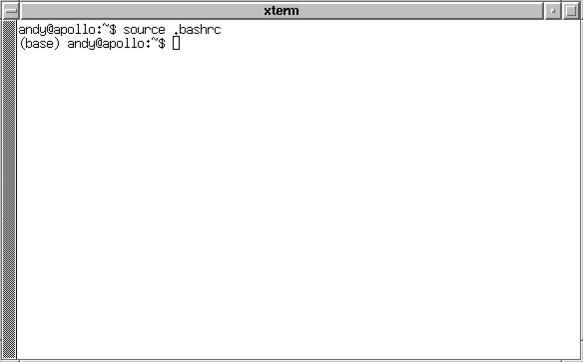
- Now either log out of apollo and then back in again or just type:
-
source ~/.bashrc
- for the new settings to take effect; your login prompt should change to look like this example, with '(base)' prefixed to the original shell prompt:
-
starting Spyder
-
- To start Spyder, just type:
-
spyder
- and you should be rewarded with the Spyder IDE desktop as in this example (this screenshot is from a Mac):
-

-
- Originally developed for Python use, Jupyter Notebook can be teamed with a variety of kernels to provide an integrated development environment (IDE) for R as well as Python. It is also possible to start Jupyter Notebook with no browser but instead listening on a specific port for incoming connections from a remote browser and this mode of operation will be described here.
- The instructions given below apply to Macs, Linux and UNIX systems - for Windows systems with PuTTY installed, please follow these instructions but remembering to change the hostname in the PuTTY configuration screens from cfm-ic1.ma.ic.ac.uk to apollo.ma.ic.ac.uk.
- The example screenshots below are from a Mac since Apple's MacOS has the same full-featured ssh client that Linux and UNIX systems enjoy, complete with its useful network port forwarding and tunnelling features. So you can use these features to connect a browser on your Mac, Linux or UNIX system to a running instance of Jupyter Notebook on apollo from outside College using only ssh, with no need to use VPN.
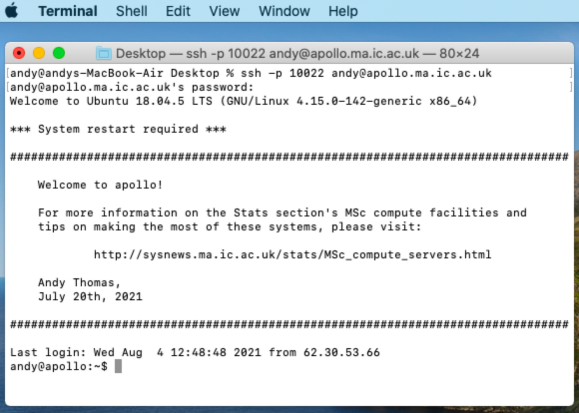
- First, open a terminal and connect to apollo with the following command, using the '-p' option to specify the non-standard port 10022 used by apollo for direct ssh connections:
-
ssh -p 10022 username@apollo.ma.ic.ac.uk
- replacing username with your own username and log in as you usually do using your College username and password, as shown in this example:
-
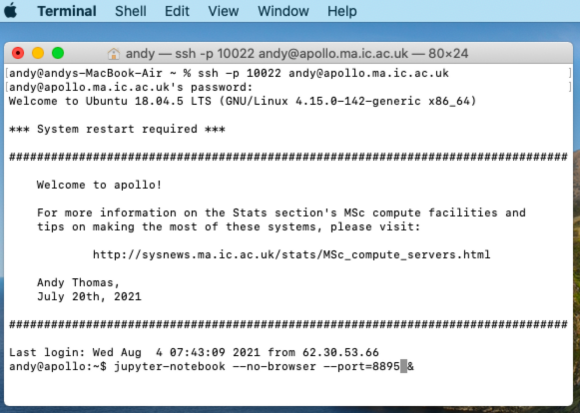
- This will set up an ordinary interactive ssh session and you now need to start Jupyter Notebook with the '--no-browser' option (since you will be using the local browser on your own system instead) on a unique network port set by the '--port' option that you will connect to in a later step. By default Jupyter Notebook uses port 8888 but we would recommend you choose some other port number; it's possible another user is already using port 8888 and our documentation for accessing Jupyter Notebook from Windows PCs using PuTTY uses port 8889 in the examples so it's quite likely this port also is already in use by another user. So choose a port number higher than this - port 8895 is used in the examples in this documentation - and start Jupyter Notebook with:
-
jupyter-notebook --no-browser --port=8895 &
- the '&' character at the end of the command detaches Jupyter Notebook from your login shell, leaving it running in the background.
-
- Now you should see a screenful of information confirming that Jupyter Notebook has started and giving you information on how to access it; disregard the URL that starts with 'file:///' as this is for connecting to Jupyter Notebook if a browser is installed on apollo itself (which it isn't) and make a note of the URL that begins with 'http://127.0.0.1'.
-
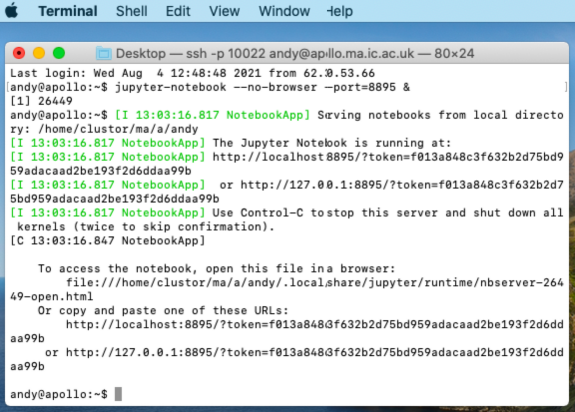
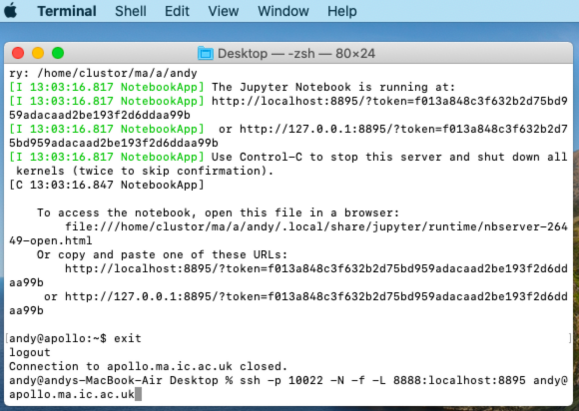
- Now press the return key to get the shell prompt back and then 'exit' to log out of apollo, leaving Jupyter Notebook running in the background. The next step is to log into apollo a second time but this time just to set up the ssh tunnel and then exit afterwards; type the following command:
-
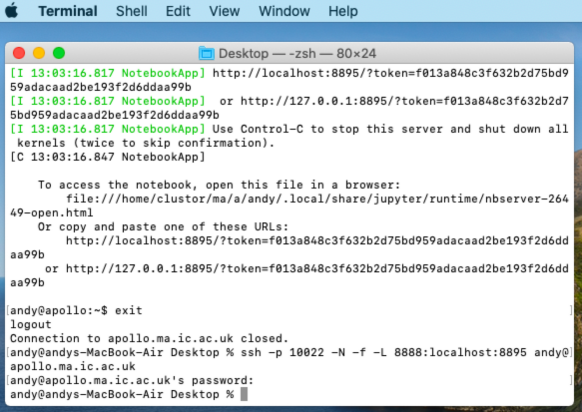
ssh -p 10022 -N -f -L 8888:localhost:8895 username@apollo.ma.ic.ac.uk
- replacing username with your own username as before, like the example screenshot below:
-
- apollo will prompt you for your password as usual but after typing this in, you will not end up with the usual login shell! Instead, ssh will set up the network tunnel and then push this into the background ready for you to use it.
-
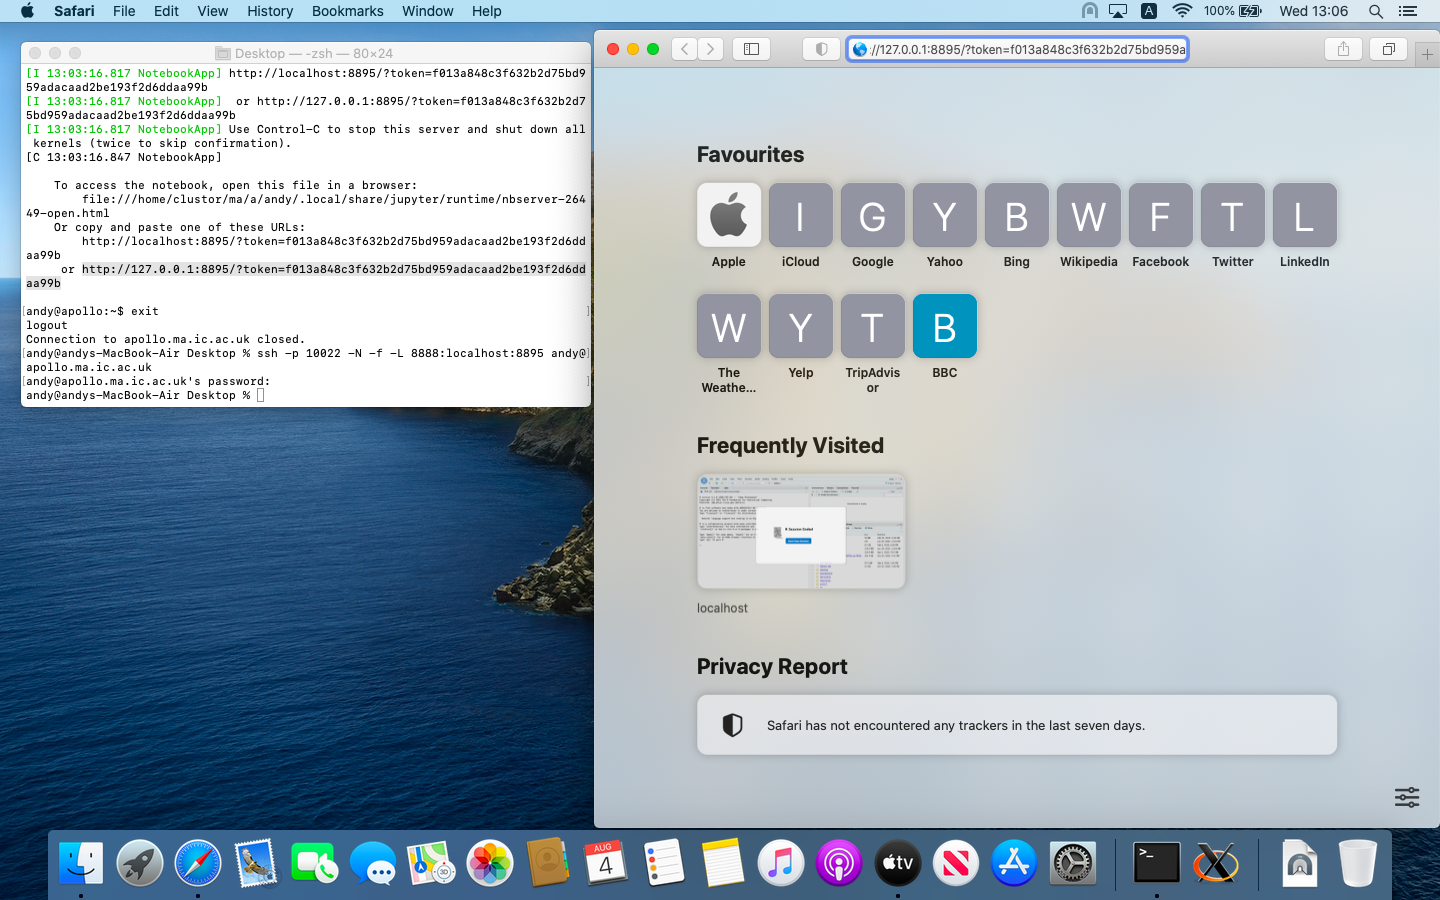
- Now you are ready to connect to Jupyter Notebook using your browser using the URL that you were sent earlier that starts with 'http://127.0.0.1' but you will need to change the port number from 8895 to 8888; first, copy and paste the URL from your terminal screen into your browser (Safari in the example screenshots but Jupyter will work with most other browsers):
-
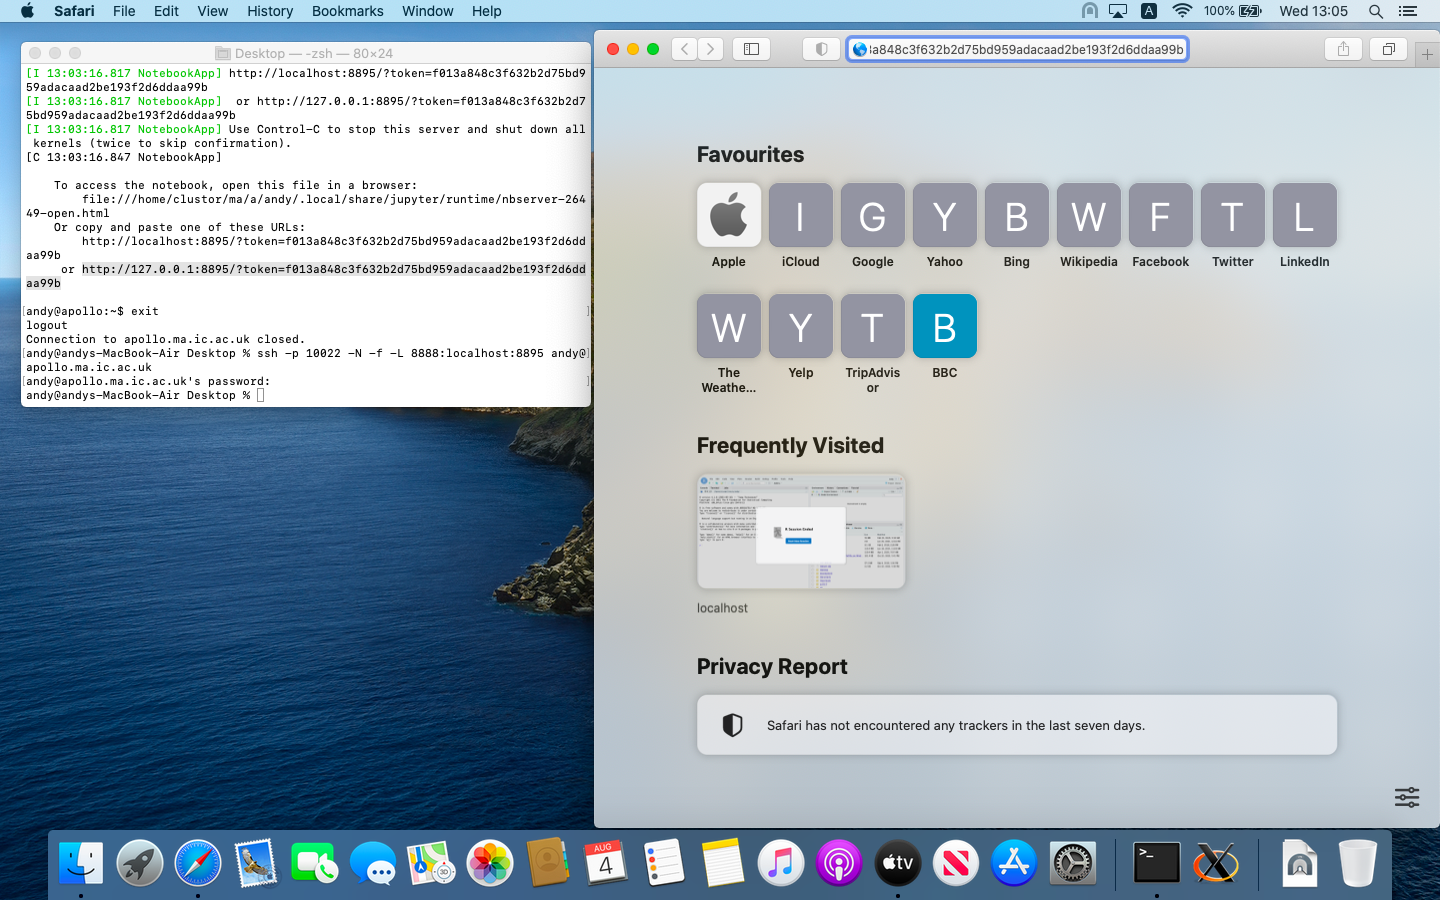
- Now go to the start of the URL and locate the part that reads http://127.0.0.1:8895:
-
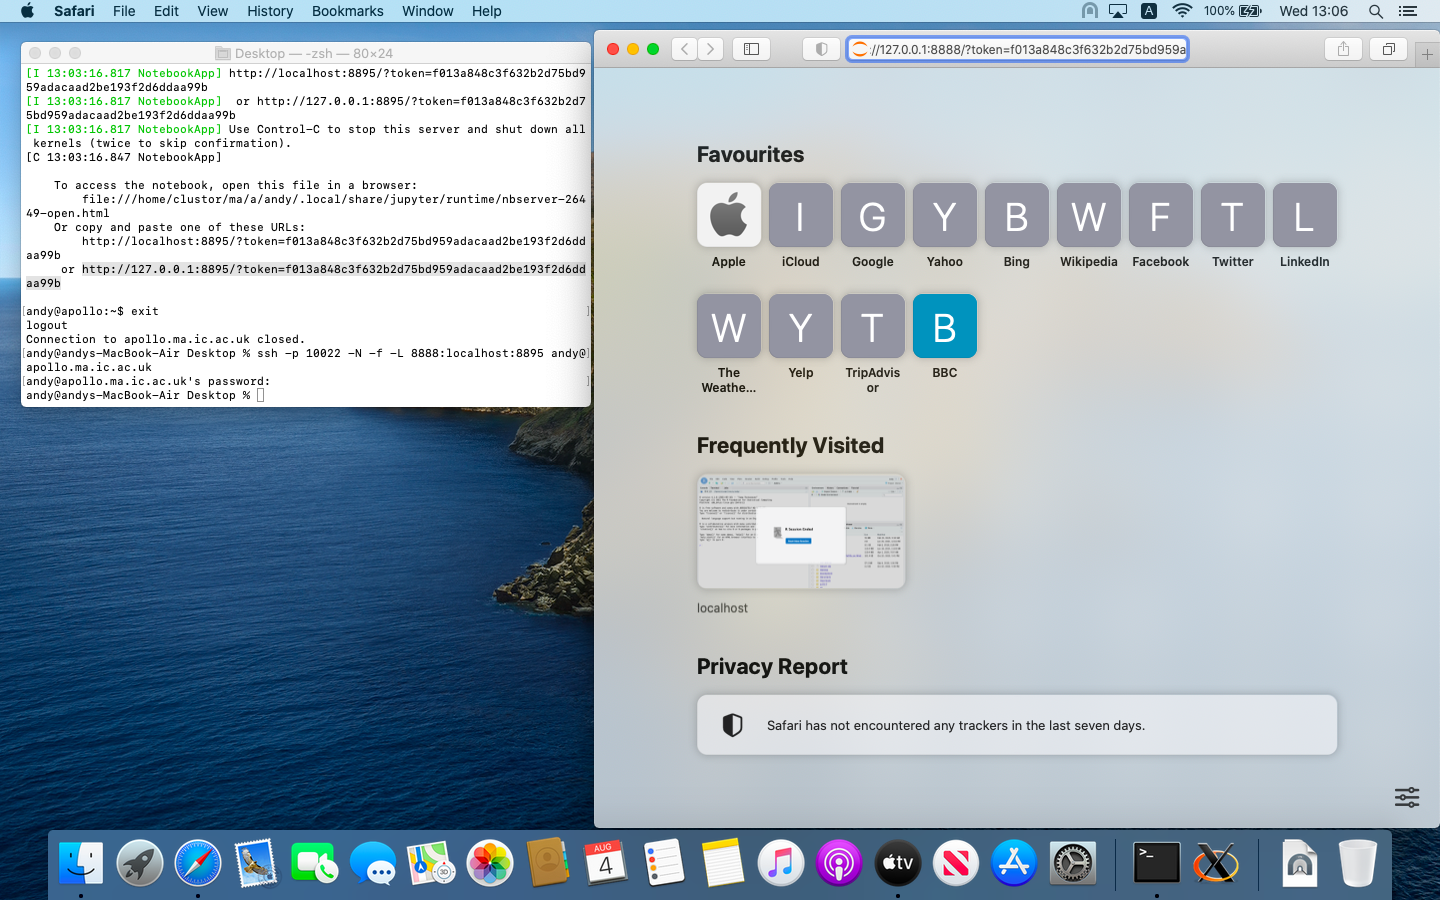
- edit the URL and change the 8895 to 8888:
-
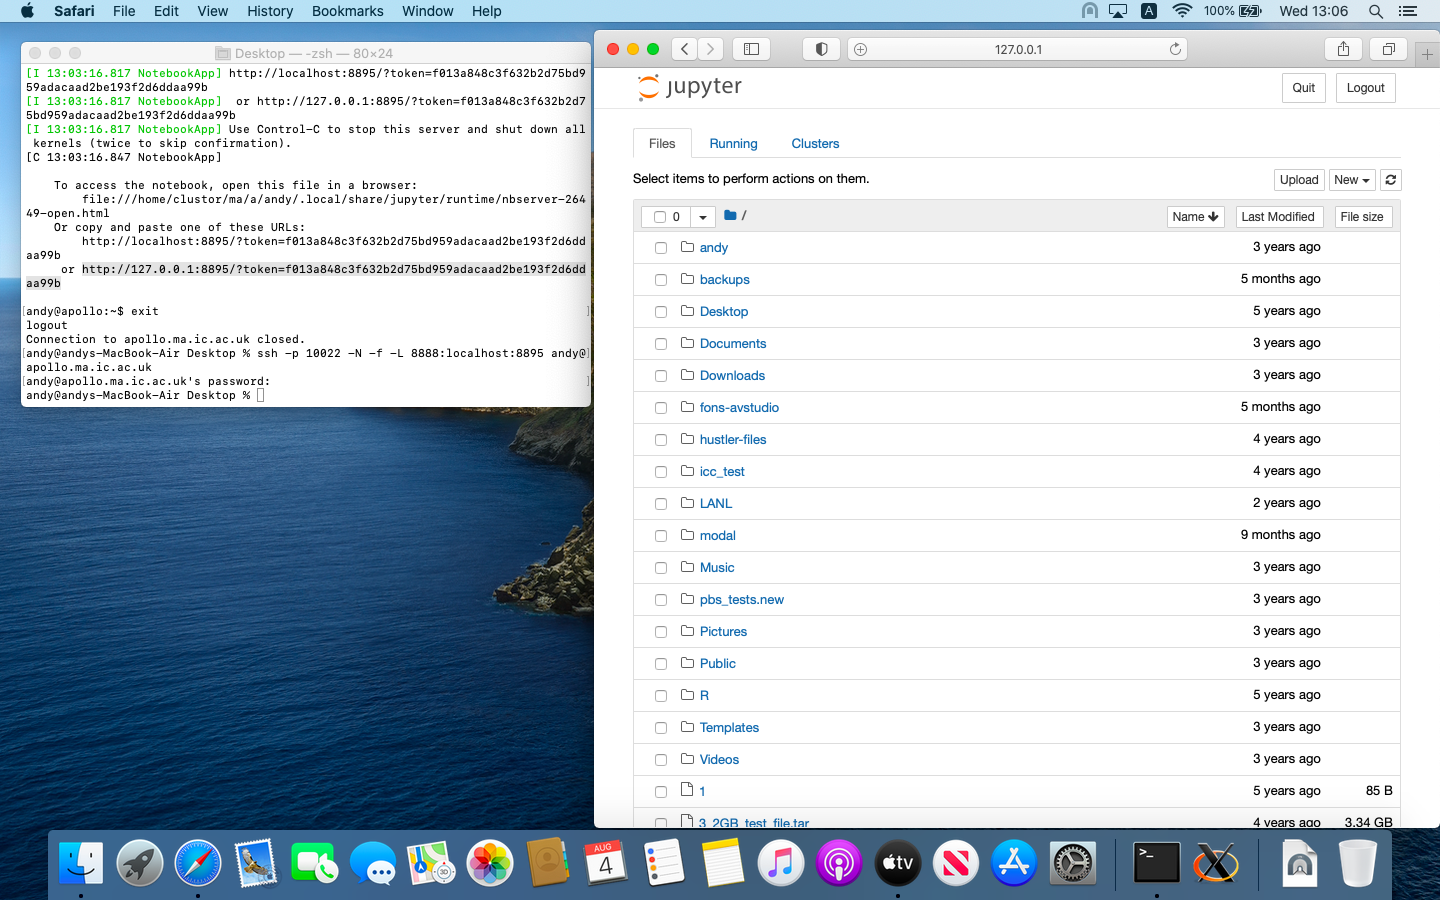
- hit return and you should be rewarded with the full Jupyter Notebook screen:
-
- When you have finished using Jupyter Notebook and you want to end the session, you can either click on the 'Quit' button near the top right-hand corner of your browser to stop the session altogther and shut down the Jupyter Notebook server or you can click on the 'Logout' button next to the 'Quit' button to end the session but still leave the Jupyter Notebook server running on apollo. Logging out allows you to disconnect and then come back later to resume working but there is a risk you might forget you have left it running, reserving a network port that others cannot use. So it's best to quit if at all possible.
- Update, February 2022:
- With increased usage of GUI IDEs on apollo it has become clear users are leaving abandoned Jupyter Notebook servers running on this system so from now on these will be terminated after 24 hours of inactivity.
- It's also a good idea to close the ssh tunnel as well since it will stay open indefinitely until you power off your own system, although you can leave it open if you know you will be using Jupyter Notebook again later. To close the tunnel you can look for it in the MacOS, Linux or UNIX process list (it will start with ssh and contain the numbers 8888), identify its PID (process ID) and kill it. An easy way to do this is with the one line command:
-
PID=`ps ax | grep ssh | grep 8888 | awk -F ' ' '{ print $1 }'`; kill $PID
- but if you have accidentally opened more than one ssh tunnel (it has happened...) then this command won't work very well so you'll have to identify the process IDs for the tunnels and terminate them individually:
-
PID=`ps ax | grep ssh | grep 8888
- then note each PID in the left-hand column and then terminate each of these with the command:
-
kill -9 PID
- where 'PID' is one of the PIDs noted in the previous command.
Andy Thomas
Research Computing Manager
Department of Mathematics
last updated: 9.6.25